Showing posts with label Entertaining. Show all posts

Wednesday, November 27, 2013

Review: Holiday Drinks with Cascade Ice

I'm not normally a sugary-cocktail kind of girl. I like the classics, of course: gin/vodka and tonic, margaritas (over ice, no salt) -- but I generally avoid things like cosmos or anything electric-colored. Two reasons: 1) the calories will destroy any attempt at healthy eating, and 2) the sugar/carbonation gives me tummy aches.


I was sent some samples of Cascade Ice sparkling waters to try these little bottles of zero-calorie, sugar-free flavored sparkling water, and of course I love to oblige. They're gluten-free, sodium-free, carb-free...vice-free, really. Sounded good on paper. I have to confess, though, that I really hate the flavored carbonated water you can get at grocery stores. They always taste super artificial and sweet.


Not these little guys, though. I gave the coconut-flavored water a try after a workout, and I gotta say, it's lovely. It actually tastes like coconut. It's light and refreshing without being too sweet or too bubbly. I bet with a couple tablespoons of coconut milk, pineapple juice, and a splash of rum, you'd have a super delish and skinny pina colada. The margarita mix is a fabulous substitute for the nasty mixer you buy at the store, and the cosmopolitan mixer is one even I would combine with vodka.


If you want to avoid alcohol all together, these would make awesome mocktails  - especially for a baby shower. Just pour over ice (I'm sipping some sparkling lemonade as we speak).

Here are some recipes I'd like to try to for the holidays:

Cascade Ice Pink Grapefruit Pineapple Punch
8 oz Cascade Ice Grapefruit
1/2 cup sugar-free pineapple juice
1 cup ice
(optional: maybe some vodka and some pomegranate seeds for fun)

White Wine Spritzer
8 oz Cascade Ice Sparkling Lemonade
4 oz Pinot Grigio
1 sprig mint

Or try my tinto de verano recipe with the sparkling lemonade!

Happy Thanksgiving, everyone! Give thanks and drink up!

-Katie
this post was sponsored by Cascade Ice. All opinions are my own.


Sunday, March 17, 2013

On My Wishlist: St. Patty's Day Edition

Being Irish and all, St. Patrick's Day is usually a pretty big deal. I was an Irish dancer when I was little, and every year I took the day off of school to dance in the parade here in STL. I continued going to the parade every year after, as often as living out of town would allow. 

This year I wasn't able to make the festivities, but that didn't stop me from celebrating in other ways. 

For instance, St. Louis is looking a lot like Ireland today, in that it is cold and rainy.

Meanwhile, in Dublin...

Now, not every day is cold and rainy in Ireland, obviously, but it was when we were there in 2008 during our Spring Break when we studied in Rome. 


We drank so much tea in Ireland because of the blustery chill. We traveled there during spring break during our study abroad, and stepping off the plane from sunny Italy, we met snow flurries. This tea kettle would totally recreate those memories.


The Kerry Cottage is the sweetest little Irish shop literally down the street from my house. It has a thatched roof and everything. They used to have a little tea room there where they served the most delicious potato soup and green salad, but it's since closed. They still have fabulous gifts for every occasion, Innis perfume, jewelry, wool, teas, and Waterford crystal (LOVE!). My mom's crystal pattern is the Clare pattern, named after County Clare in Ireland. It's a gorgeous but discontinued pattern.


Here's a similar pattern: 

Click here.


And the gorgeous Kerry Cottage fragrances:


With notes of freesia, lily of the valley, and violet. Click here.


With notes of rose and lemon. Click here


The folks over at Every Little Thing (a STL food blog) made an delicious Irish dinner that makes my mouth water:


This adorable blog called Adore Your Blog has a bunch of great ideas for St. Patrick's Day entertaining and inspirations from Ireland.

From Adore Your Blog.
The Boulder Locavore made some authentic Irish Concannon - basically mashed potatoes with kale. YUM!


What'd you do this St. Patty's Day?

-Katie


Sunday, December 2, 2012

The Most Wonderful Time of the Year


It's that time again. The holidays. This year, Justin and I hosted Thanksgiving in our tiny flat. We brined a 13 pound turkey for three days before roasting it along with sausage-sage stuffing, green beans with candied bacon, and mashed potatoes with gravy made from homemade turkey stock. For dessert, I made a chocolate pudding pie with an almond crust {recipe below!}
Pudding. Yum.
Almond crust with mini chocolate chips. It tastes like a cookie, but is gluten-free and low fat (shhh)

Baby Jonathan (my brother's kid) indulged maybe a little too much.


Now, it's time to turn our focus onto Christmas. This December 1st, it feels nowhere near the holidays at 60 degrees. I'm wearing shorts. And a T-shirt. In winter. Something is very wrong with that.

Nevertheless, a balmy start to the season won't stop us from cranking on the holiday cheer.

I took some branches from the holly bush outside my house, plopped them into a vase, and added a candle. Here it is in daylight:


And at night:


I went to Michael's a couple weeks ago, I had a plan to make a wine cork wreath. When I was checking out, I told the woman behind the counter my idea (the procedure to do so, of course, confirmed with a Google search). She asked if I had ordered the wine corks online.

Um. No.

She asked because you might need about, oh, 200 corks to do this.

For this project, just hot-glue 150 wine corks (I guess you could order them online) to a straw wreath. Add a pretty bow. Presto. Easy enough for me to do it!

Darla, of course, is fully embracing the entire tradition.
 

Happy Holidays, Readers. 

-Katie


Chocolate Pudding Pie with and Almond Crust

Ingredients
For the filling:
1 - 5.1 oz instant chocolate pudding (I used fat-free, sugar free)
Skim milk
1 container Cool Whip (I used fat-free, sugar free)
1 tsp instant coffee

For the crust:
1.5 cups almond meal (available at Trader Joe's)
3 tbsp melted butter
3 tbsp sugar
1/2 cup mini chocolate chips

Preparation:
1. Preheat the oven to 350 degrees.
2. For the crust: mix the melted butter and the almond meal. Mix together until moist. Add chocolate chips and mix. Press into a pie plate. Bake for 15-20 minutes or so until golden brown.
3. For the filling: measure out the proper amount of milk for the directions on the packet of pudding. Add instant coffee and dissolve. Add pudding mix and whip until firm. Add half the container of Cool Whip.
4. When the crust is cooled, pour in the pie filling. Let it set in the fridge over night. The day of your event, freeze the pie for an hour to harden. While you're eating dinner, let it defrost on the counter so it's just right.


Monday, November 5, 2012

Butternut Squash Lasagna with Sausage, Mushrooms and Broccoli Rabe

I'm something of a lasagna freak. I love trying new things with it — Mexican lasagna with tomatoes, black beans, and cheddar; artichoke lasagna with bĂ©chamel; classic bolognese lasagna — you name it.

This was probably the best we've ever made.


The sauce is a silky butternut squash puree. The homemade lasagna noodles are layered with spicy Italian chicken sausage, sauteed shiitake mushrooms, broccoli rabe and ricotta cheese.

This is a very complex recipe — something for lazy Sundays or Saturday. Really, though, nothing in the world is better to me than spending my days off investing in an hours-long meal that will cook in the oven for an hour or so. No kidding.

Take the time to make this for a special occasion. You will not be disappointed.


Ingredients
For the butternut squash sauce:
1 medium butternut squash
1-1.5 cups chicken broth
Salt & Pepper
1 tbsp garlic-infused olive oil

For the sausage & mushroom filling:
1 lb spicy Italian chicken sausage
1/2 yellow onion, chopped
1/2 tsp each: bacon fat, butter, olive oil
~1 lb shiitake mushrooms, chopped
2 cloves garlic, minced
Pinch thyme
Pinch red pepper flakes
Pinch salt & pepper
Optional but strongly encouraged: 1 cup dried shiitake mushrooms, 1.5 cups chicken broth

For the cheese mixture:
1 bunch broccoli rabe, chopped
1 container whole-milk ricotta cheese
Pinch red pepper flakes
Pinch salt

Homemade pasta sheets (or you can buy them - about a pound. We made the whole wheat version.)

Pecorino Romano cheese

Preparation (Written by Justin)

1. Chop half of a yellow onion and cook on medium heat in a combo of bacon fat, butter, and olive oil (or just one of the above). Add about a pound of sliced shiitake mushrooms, a couple cloves of chopped garlic, thyme, and crushed red pepper. Season well with salt and pepper and cook for another 7-8 mins. 

2. This next part is optional, but makes a BIG difference: we took about a cup of dried shiitake and rehydrated them in hot chicken stock and let them sit in it for about 20 mins then blend until smooth. Add this mixture to the mushrooms and cook until the liquid is almost completely reduced; it should look like gravy.

3. SautĂ© a pound of spicy italian chicken sausage or whatever ever ground meat and add it the mushroom sauce.

4. Next, blanch chopped broccoli rabe in salted boiling water for about 10 mins. Drain, rinse under cold water and squeeze out all the extra water. Add this to ricotta cheese. Add salt and crushed red pepper.

5. For the butternut squash sauce, cut a squash in half longitudinally, douse with olive oil, salt and pepper, and roast skin-side up for about 45 mins at 375 degrees. Once cooled, blend the squash with chicken stock and garlic oil until smooth.

6. Make the pasta (or buy some); if the pasta is fresh, blanch it for 2 minutes in boiling water. If dried, cook them until they're al-dente. 

7. Time to assemble: Add a layer of butternut squash sauce to the bottom of the pan. Layer on the pasta.  Add the ricotta-broccoli rabe mixture, then the sausage-mushroom mixture, then a layer of Pecorino Romano cheese. Then add another layer of squash sauce, pasta, ricotta, mushroom-sausage sauce, 
Pecorino. Repeat until you run out of ingredients.

8. Bake at 375 for about an hour. Let it rest for 10 minutes (if you can wait that long!)


-Katie

Monday, July 16, 2012

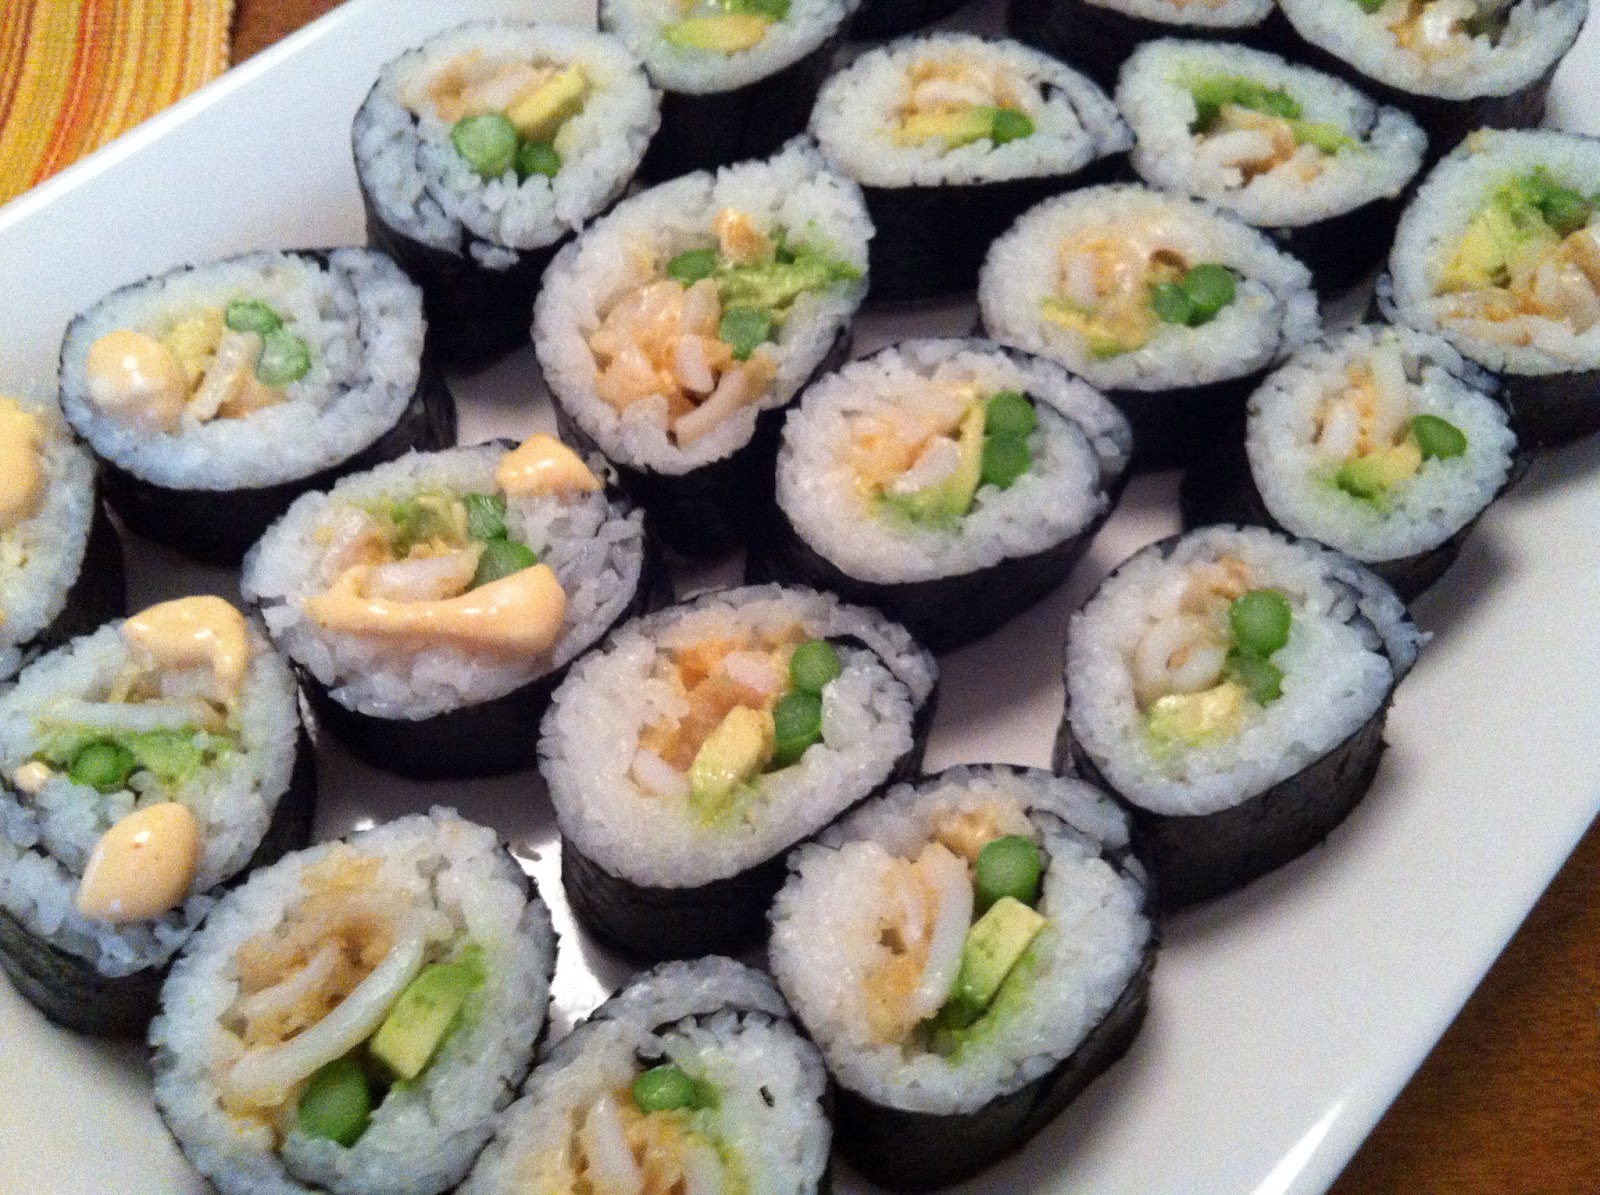
Crispy Calamari Sushi

I love sushi, but sushi doesn't love me.


Let me rephrase that.

I love sushi, and sushi loves me. But it does not love my wallet.

Justin and I will get sushi as often as our bank account allows. We get it on vacation when we want to treat ourselves, when we go out with parents, or when we get a good deal with Groupon. Sometimes we'll get sushi lunch specials. But typically, my sushi cravings occur more often than my sushi binges.

The budget-busting part of sushi is undoubtedly the high-quality raw fish. Without that grade-A tuna or salmon, you can pretty much forget it.

Unless …

I love fried calamari. I love sushi. When the thought finally struck me to combine the two, I was amazed that I'd never thought of it before. Isn't it obvious? A delicious tempura-fried squid inside the roll. Duh!


I'd say it's just as good as any sushi I've had anywhere, but I guess I'm biased. If cooking squid makes you cringe, use some smoked salmon, smoked trout, or slivers of your favorite cooked fish instead!

Ingredients
For the rolls:
2 cups sushi rice
2 tbsp rice wine vinegar
1 tbsp sugar
1 tbsp salt
6-8 sheets nori
8-10 stalks asparagus
1 avocado
3/4 lb calamari (tubes only)
1 cup flour
Spicy Mayo (below)

For the spicy mayo
1/2 cup mayo
1 tsp Sriracha 
1/2 lime
Dash fish sauce

For the dipping sauce
4 tbsp soy sauce
1 tsp fish sauce
3 tbsp water
1 clove garlic
1 small knob ginger
handful of basil leaves
1 tsp sesame seeds

Preparation


Rinse the tubes well. Cut them in half lengthwise, then cut each half into skinny strips. Rinse them again until the water runs clear, then pat dry. Place them in a fine mesh strainer set over a bowl and leave in the fridge for a few hours to dry out a bit.


Meanwhile, prepare the rice: Rinse the rice well by soaking it in a large bowl with cold water for 5 minutes. Drain and repeat this process two or three times until the water is clear. Combine the 2 cups of rice with 2 cups of water and bring it to a boil over high heat. Once it's boiling, set it to low, cover, and let it simmer for 15 minutes. Then take it off the heat and let it sit for 10 minutes. Fluff with a fork.

Mix the vinegar, sugar and salt in a large bowl and microwave for 15 seconds. Tumble the cooked sushi rice into the bowl with the mix and toss together until the rice is nicely coated. Let it cool.

For the mayo, mix all the ingredients together in resealable bag.


For the dipping sauce, toss all the ingredients into a small food processor and blitz until done. This stuff is pretty strong, so add more water to taste if it's too much for you.


Blanch and shock the asparagus. Cut the avocado into skinny slices.

To assemble: Lay a sheet of nori on your cutting board in the "landscape" position (for any MS Word users out there). Dip your fingers into a bit of water to keep the rice from sticking to your hands. A handful at a time, press the rice onto the sheet of nori, allowing for a small strip of bare nori to remain at the top. At the end closest to you, place a couple stalks of asparagus, a few slivers of avocado, and a squirt of the spicy mayo (snip the corner off the bag and pipe out).

Meanwhile, dust the calamari in some flour and fry it in a few inches of oil (we used olive oil, but you can use vegetable oil, sunflower oil, etc.) You only need to fry it for a few minutes until the crust is a light golden brown — don't overcook! Might want to try a couple batches to see how it works for you.


At the stuffed side, start carefully rolling away from you, tucking the edge underneath. When you're almost at the edge, use your finger to dab a little water on the naked edge of the nori to seal the end of the roll. Rock the roll lightly with your hand to make sure the edge sticks.


Cut the roll in half, then cut each half into halves, then those quarters into halves so that you get 8 perfect pieces of sushi.


Top with extra mayo if you like. This dinner might not be the quickest to make, but it definitely satisfies any sushi craving and is great for a crowd. 


No need for compromise ;-)

-Katie


Wednesday, July 4, 2012

Happy July 4

Holidays at my parents' house is always fun — lots of family, friends dropping in and out, and in the summer, pool time.

Poolside, baby. No, I'm not posting a pic of me in a bikini (ha).

 Today was over 100 degrees in St. Louis, but when you are jumping in and out of the pool, sipping on Budweiser Limaritas (Mom picked those out) and snacking on potato salad, cookies 'n cream cake, and pork steaks (it's an STL thing) the heat is more than bearable.

The cookies 'n cream cake was ooey gooey chocolatey goodness. It's the perfect summertime dessert — surprisingly light and cool.

Whipping cream for the cookie cake

My favorite apron - I wore this for 8 hours straight yesterday while preparing all the food :)

For this Independence Day my mother wanted me to make all the sides. This meant that I showed up with 4 sides (green beans, potato salad, corn off the cob and mixed greens), while Mom made deviled eggs, 3 types of meat, and pasta salad. A family member brought green bean casserole. All together we had 3 desserts. That's 13 dishes.

For 13 people.
Mmmm cookies layered with chocolate cream. 


Good ol' red white and blue.

We had way too much food. So many leftovers.
Leftover tater salad.

But in a way, isn't that precisely what America is all about?

All kidding aside, it was a great holiday. Happy secession from the redcoats, everyone!

Cookies n' Cream Cake
{Printable Recipe}
Ingredients
  • 2 boxes of store-bought chocolate chip cookies (I used Keebler's Original)
  • 1 container Cool whip
  • 3 cans coconut milk
  • 2 tbsp cocoa powder
  • 1 tbsp sugar (or Stevia)
  • Strawberries & Blue Sprinkles (for a little flair)
Procedure
  • This recipe is a do-ahead by necessity if you want to use coconut milk. You can skip coconut flavored filling if you want, just use double the Cool Whip. If you want coconut cream, start 3 days before the event. 
  • Open the cans of coconut milk. Let them sit uncovered in the cans in the fridge overnight. The next morning the cream will have separated from the coconut water. Skim the cream off the top, leaving the water underneath. Save the coconut water to drink as is, or in a smoothie!
  • In a stand mixer, plop to coconut cream with the cocoa powder, and the sugar. Whip it on high speed for 5 minutes until thick.
  • Fold in 2/3 of the Cool Whip. Taste it to see if you like it, and add more chocolate/sugar if needed.
  • Using a springform pan, first put a layer down of cookies. If there are big spaces, break up a couple cookies to fill in the holes. It doesn't need to be perfect at all.
  • Spread a layer of the chocolate cream (a big dollop or two — just enough to cover the cookies). 
  • Add another layer of cookies. Repeat the cookie-cream layering until you reach the top of the pan. On the last layer of cookies, put down a layer of PLAIN Cool Whip so that you have a pretty white topping. 
  • Cover tightly with plastic wrap and let this sit in the fridge overnight so that the cookies soak up the cream and the cream sets.

Serves 8-12

Perfect Potato Salad
{Printable Recipe}
Ingredients
  • 5 lbs potatoes (too much? Scale down if you need to!)
  • 3 bay leaves
  • 5 cloves garlic
  • 3 cups mayo
  • 2 cups sour cream
  • 1/2 cup Dijon mustard
  • 1/4 cup sweet relish
  • 1/4 cup red wine vinegar
  • Salt & Pepper
Procedure
  • Peel potatoes. Set them in a large pot. Cover with cold water. Add 3 cloves of peeled garlic and the bay leaves. Boil the potatoes for 15 minutes or until fork tender.
  • Drain off the taters and let them cool for a bit. Chop them up into bite-sized chunks.
  • In a big bowl, combine the mayo, sour cream, Dijon, relish, vinegar and garlic powder. Add salt and pepper to taste. Always taste things like this as you go, and add more of this and more of that until it tastes good to you (who knows, maybe I like more vinegar than you do!)
  • Add the potatoes while their still warm and mix the salad. Let it sit in the fridge until you're ready to eat — a total do-ahead!
Serves infinity (or maybe like 20 people).


-Katie

Saturday, June 30, 2012

Catering a Party: Timing and Tips

One of the hardest parts of planning a party is the timing of cooking and plating the food. I can't imagine how chefs do it in restaurants — it's kind of like a superpower, I suppose.

I'm not a pro, but I love to cater parties. I've done a high school graduation, a wedding (yep, no joke), and two baby showers. The most recent one was for my hubby Justin, which was a small surprise party for him after he finished his Step 1 medical school boards.

I did a "Happy Hour" theme because the hour after Justin finished boards was bound to be a very happy hour indeed.

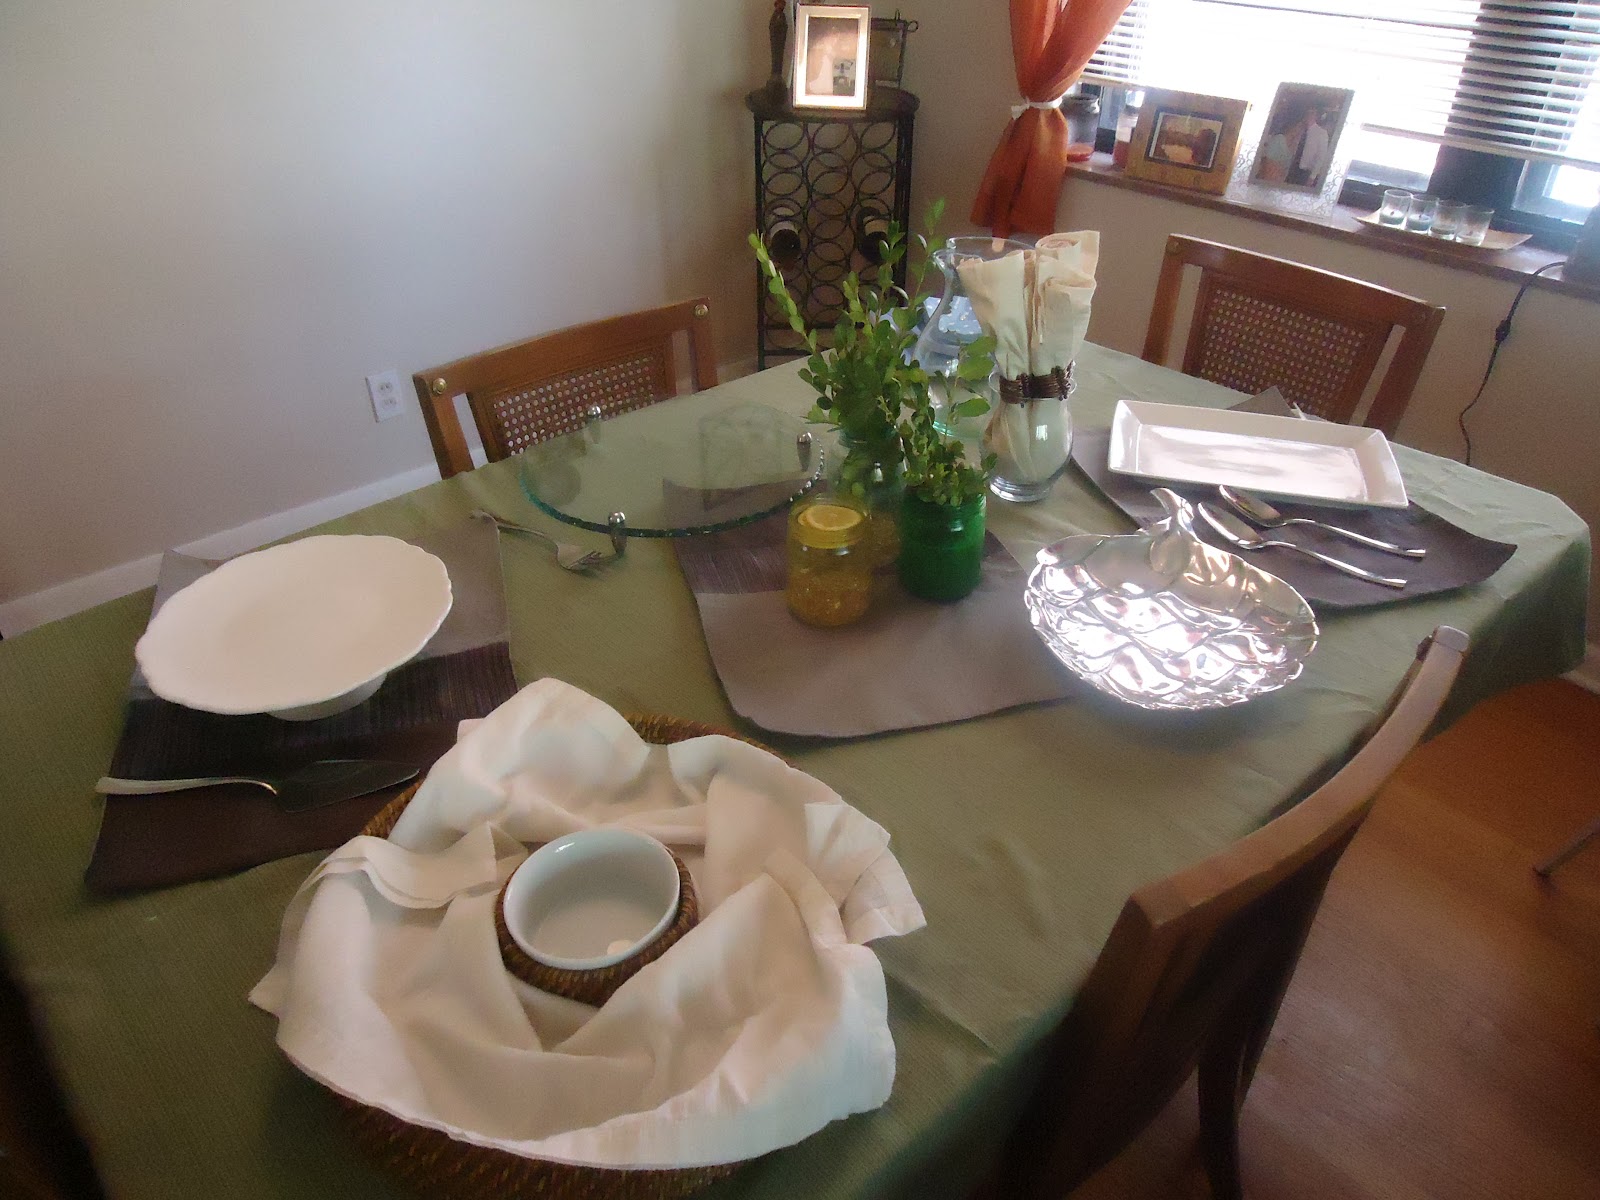
Do a simple layout of the serving table

I blew the budget on balloons, so the centerpiece is old jars and clippings from the bushes in our front yard. They actually look pretty good, no?

Print out the menu to give a special touch to the layout.

I had to put this in here — doesn't Darla look like an alien?


I think it may have been the most successful small party I've catered yet. This is due to two big concepts:

1. Pick 3-4 really delicious dishes that you know you can make, and no more.

This one is really hard for me. I want to make a dozen different appetizers, a meat course, a pasta course, a veggie … and it's always way too much. For my sister-in-law's surprise baby shower I made six different apps, pork tenderloin, pasta, cupcakes … for 15 people. I had so many leftovers and had such a hard time timing everything that a couple of the would-be amazing appetizers ended up a little overdone.

It's not worth the struggle. Remember the basic rule of journalism, which applies to catering as well: KISS {Keep It Simple, Stupid}.

2. If you are inviting people you love, it will be a success.

The food is important. It has to be tasty. But people will have fun if they like each other, and atmosphere is always #1. If it's the type of party where you can have alcohol, make a fun cocktail and a few great dishes that people can chat over.

Don't stress over everything being absolutely perfect. Only YOU will notice that the salad was a little overdressed or that the decorations were a little haphazard since you put them up at 2 a.m. the night before. Indulge in good company.

For my cousin Erin's baby shower, I made 3 appetizers, 1 pasta, and 1 party favor. The cake was provided. I made one hot appetizer and two cold, to keep it easy. Most of it was made the day before.

With this basic outline, you'll be coasting through a catering job.

Here's the breakdown:
Taco Cupcakes
Mixed Salad
Fruit Salad
Penne Alfredo with Sausage and Spinach (recipe at bottom of page)
Samoa Truffles
Fizzy Pink Lemonade

The Night Before…

1. Prepare the taco cupcake filling.

2. Chop the veggies/lettuce for the salad {I put cucumbers in mine, and chopped the tomatoes and avocado at the last second}. Make the dressing for the salad {olive oil, red wine vinegar, lemon juice, honey, mayo, salt and pepper}. Reserve.

3. Chop the strawberries for the fruit salad.

4. Make the sauce for the pasta {See recipe below}.

5. Make Samoa truffles {the recipe is in the link — these things are addictive}

An Hour Before the Party…

1. I served the fruit salad in a hollowed out watermelon, which was pretty cool. If you do this, check out this video for a tutorial. My fruit salad had watermelon, strawberries, and pears. That's right, only three fruits. Remember: KISS.

2. Assemble the wonton tacos and preheat the oven.

3. Set up the serving area.

Half an Hour Before the Party…


1. Boil a big pot of water for the pasta. Remember to salt it!


2. Chop the tomatoes & avocado for the mixed salad. Put it all in a serving dish.


Fifteen Minutes Before the Party…


1. Throw the pasta in the water. Boil for 7-8 minutes. Drain. Toss in the sauce and warm it through. Keep it in the pot until people start to arrive, then put it into the serving dish. It's OK if it's not piping hot.


2. Throw the wonton tacos into the oven. Cook for 10 minutes. Let them cool for 5. These can be room temperature.


3. Set out the fruit salad.


4. Toss the mixed salad. Dress it with the salad dressing.


5. Combine the lemonade concentrate with ginger ale. 


By the time you've done all this, the party will be starting. It's OK if not everything is on the table right away — no one is thinking about food right as they walk in. 


As you can see, all these recipes are very low maintenance and can be more or less served at room temperature. This is not a sit-down meal.


Here are some more recipes that work great for a crowd:

Endive Salad Cups {recipe follows}
Tequila-Lime Fish Tacos with Mango-Avocado Slaw {recipe follows}

Endive Salad Cups
{Printable Recipe}
Ingredients
2-3 heads endive, washed
2 Roma tomatoes
1/2 cup marinated artichokes, chopped
1 English cucumber, peeled, seeded, chopped
1/4 cup Parmesan cheese
Olive Oil
Salt
1 lemon


Cut the tomatoes in half and squeeze out some of the pulp so the salad isn't soupy. Chop them into chunks. Combine the tomatoes, artichokes, cucumber, a splash of olive oil and the juice of half a lemon. Dust with Parmesan cheese. Toss. 


To serve, cut off the base of the endive, separate the leaves, and spoon the salad mixture into the endive cups. 


Tequila-Lime Fish Tacos with Mango-Avocado Slaw
{Printable Recipe}
Ingredients
1 lb tilapia
1-2 tbsp Tequila-Lime seasoning (available at Soulard Market)
wonton wrappers
1/2 bag slaw mix
1 mango
2 limes
2 tsp honey
1 tsp olive oil
Salt & Pepper
1-2 avocados


Marinate the tilapia in the tequila-lime seasoning for at least an hour. Combine the lime juice, olive oil and honey with some salt and pepper in a large bowl. Cut the mango and avocados into small cubes. Toss the in the vinaigrette. Add in the slaw mix and toss to coat. Let this sit for about an hour to soften a little and absorb the flavor. Not a good idea to do this the day ahead — you don't want it to be too wilted!


Saute the tilapia for three minutes per side until you can flake it easily with a fork. In the meantime, place the wonton wrappers into a cupcake tin to form little cups. Toast them in the oven at 400 degrees for ten minutes until golden. Take them out, let them cool. 


To serve: Fill the wonton cup with a tablespoon of grilled fish and top with the mango-avocado slaw.


Penne Alfredo with Sausage & Spinach
{Printable Recipe}
Ingredients
1.5 lbs penne pasta (this is for a crowd, you can always scale back though!)
1 quart half-and-half
2 tbsp butter
2 tbsp flour
1 bag baby spinach
1 lb Italian sauge
2 cups grated Parmesan cheese
Chicken broth (no real measurement here - it’s just to thin out the sauce when it gets too thick)
Salt and Pepper
  1. Brown the Italian sausage until done. Drain off all the sausage onto a paper towel to get the grease out. Wipe out the pan (unless you like a little sausage grease in the food - which is totally fine!)
  2. Melt the butter in a large saucepan. Add the flour and whisk it around for 2-3 minutes. The flour thickens the sauce.
  3. Add the half-and-half, whisking constantly. When there are no lumps (just a few minutes), set the temperature to medium-low and let this go for ten minutes.
  4. The sauce will thicken up over time. Add at least a teaspoon of salt...probably more like 2-3. Taste it as you go for desired seasoning.
  5. When the sauce has reached Alfredo-like consistency, add the spinach and sausage. Let the spinach wilt into the sauce (this might take a little while depending on how high the heat is on your pan - you can always crank it up if you want it to move faster).
  6. Cook the pasta and toss it in the sauce. Let the pasta cook in the sauce for five or ten minutes to get it really soaked up.
  7. If your sauce gets too thick, just add a splash of chicken broth to thin it out. At your shower, I cooked the pasta at the last second, tossed it in the sauce, warmed it up in the big pot, and added chicken broth to get it to the right consistency. There’s no right or wrong way to do it.
And Remember: A Happy Chef = A Fun Party


-Katie

Related Posts Plugin for WordPress, Blogger...